Getting Started
Christmas is just around the corner! Can you believe how time flies? I wanted to share with you a fun family activity that makes for a fantastic homemade gift. This is a fun recipe for both beginners and novices! In this recipe I will be using non-toxic, acrylic paints that are washable and safe for kids. It is a fun way to embellish the soap and will simply wash off as you use the bar. Be sure to put an apron on because while the paint will wash off your skin, it may not wash off your clothes as forgivingly.
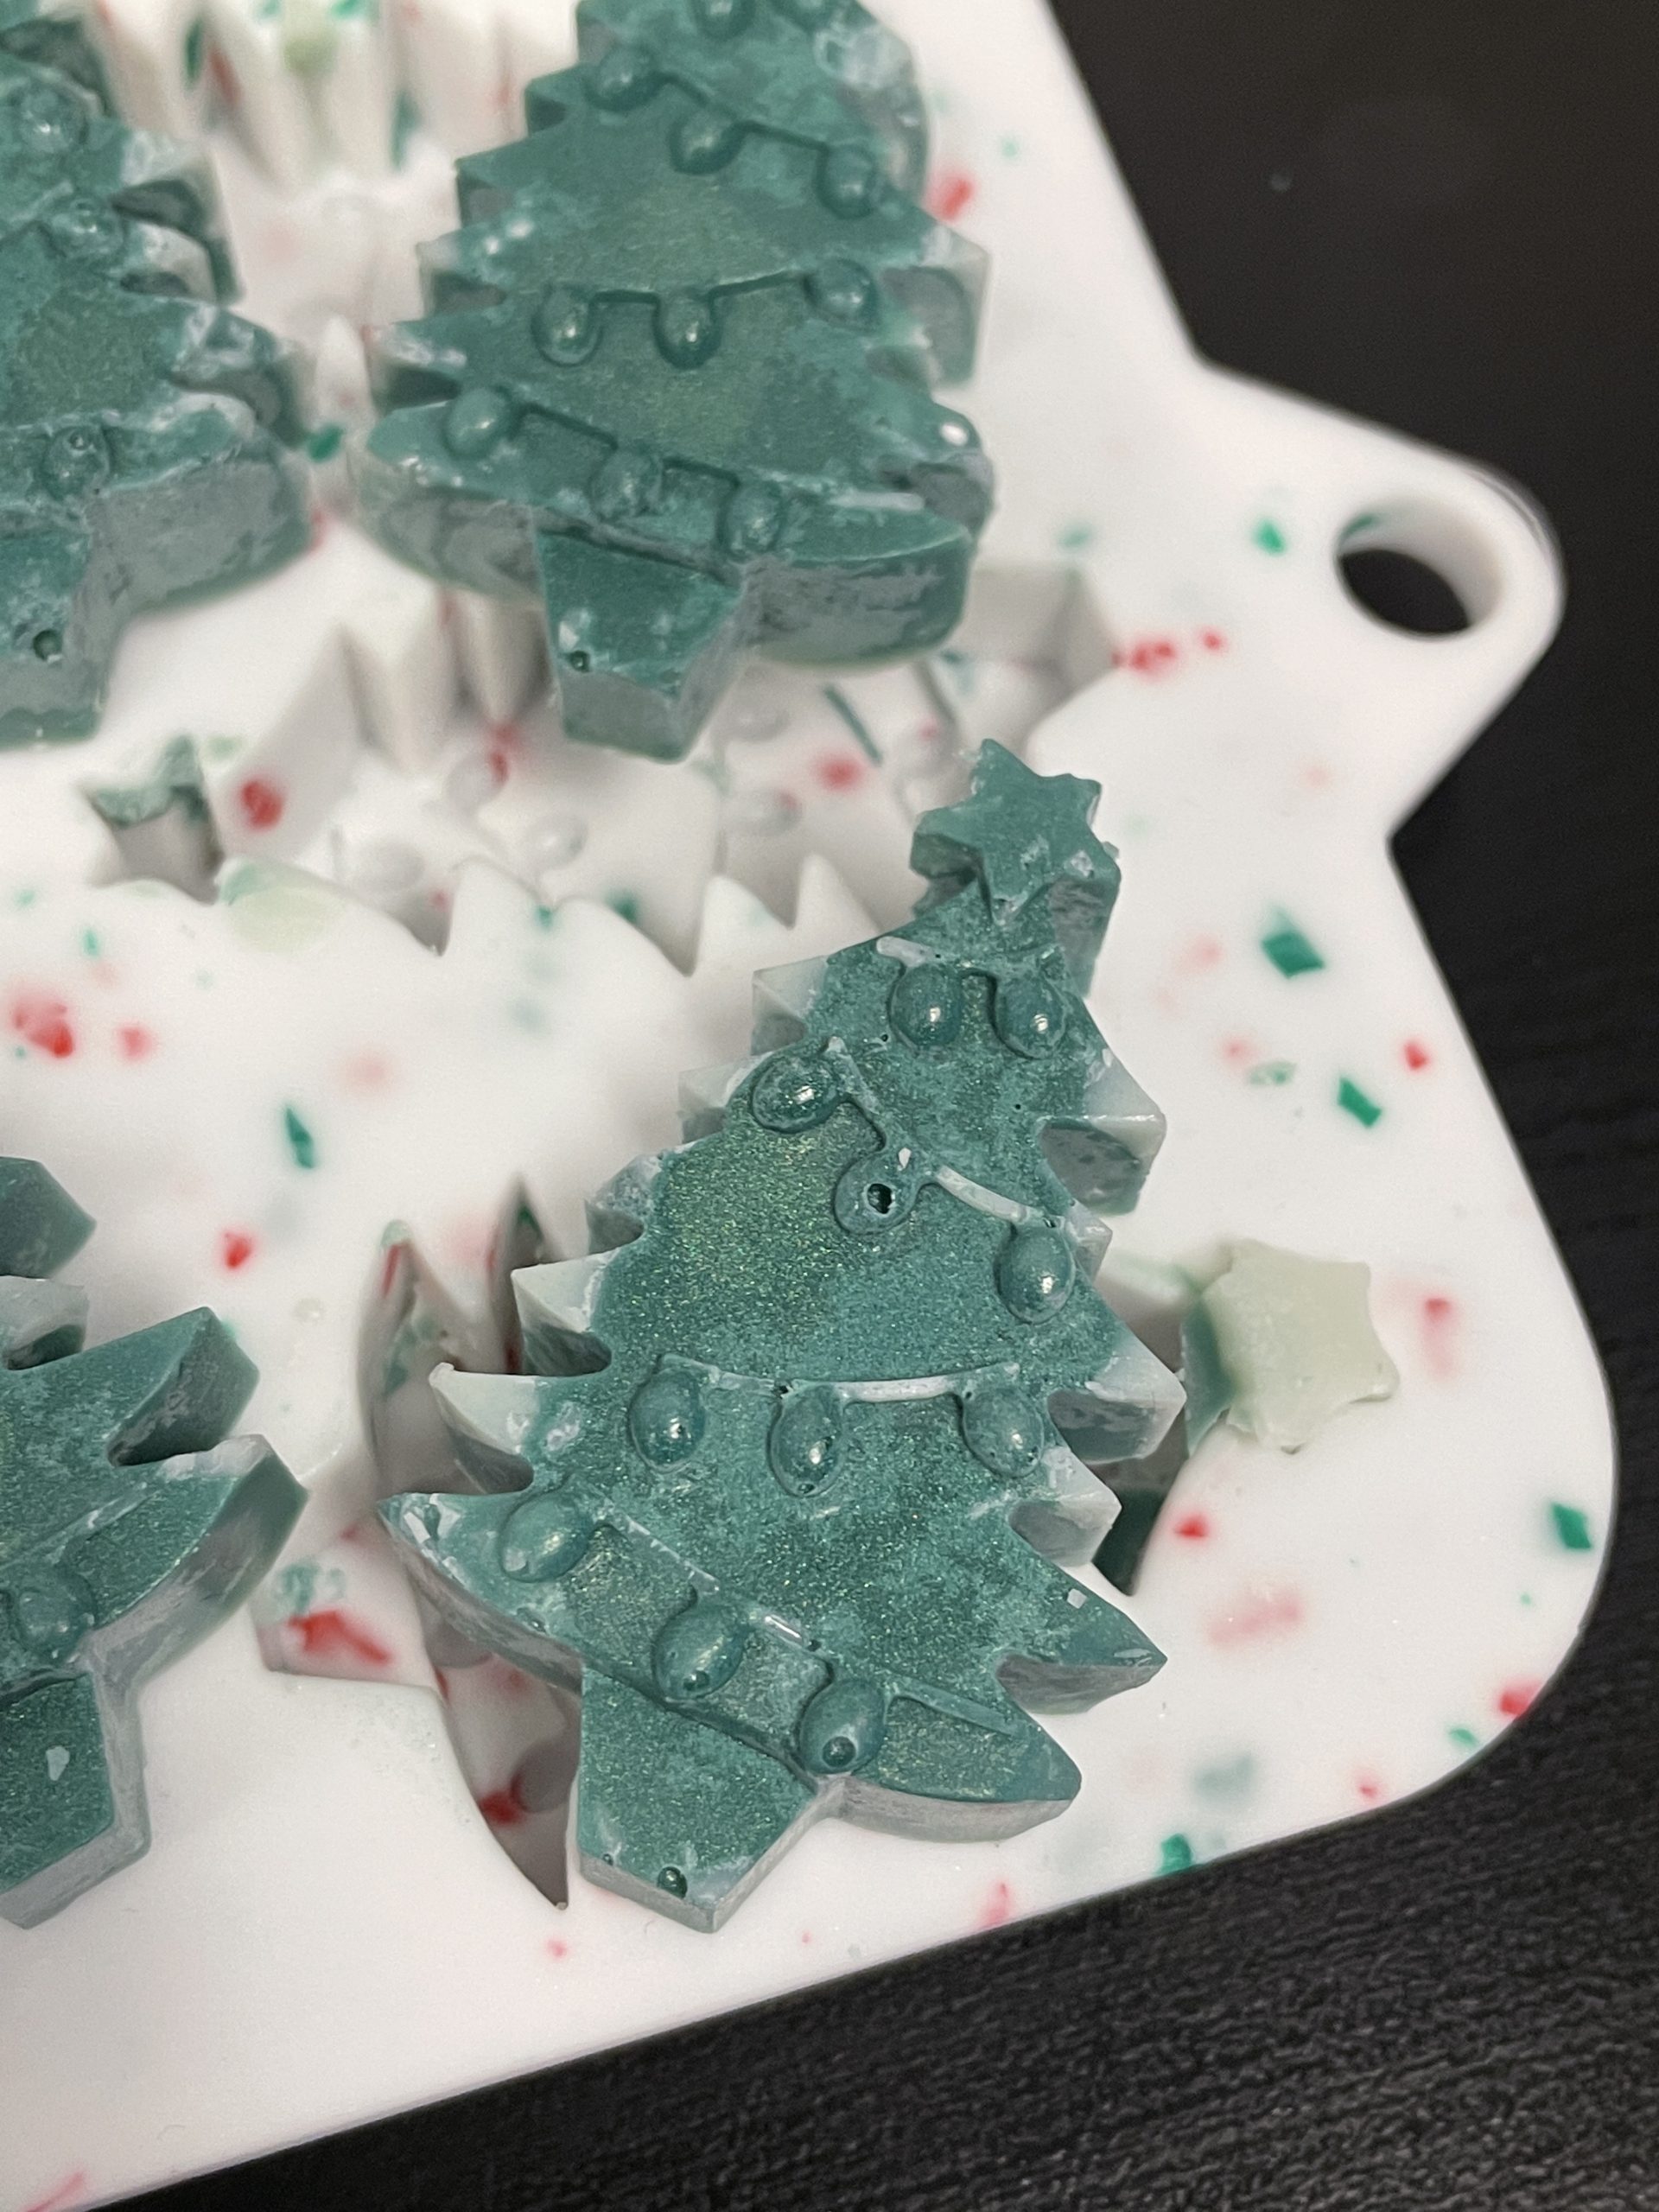
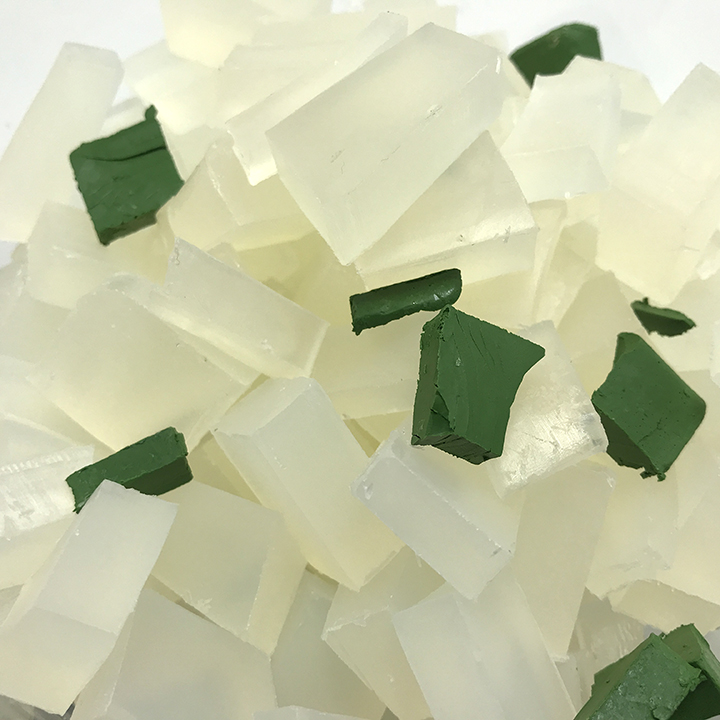
This recipe yields six Christmas tree soaps so I will need 1.5 lbs. of soap base. I’ve chosen one of my favorites, SFIC Clear Low Sweat, as it has a lower glycerin content and doesn’t feel as oily as some other bases. This also helps prevent dew from forming on the finished bars if you happen to live in a humid area.
Additional Supplies
Spray bottle with rubbing alcohol, cutting board, heat-resistant plastic or glass container(s), spoon (disposable is fine), non-toxic acrylic paints, paintbrushes, palette.
Using a kitchen knife or soap cutter, dice the soap into small chunks and place into a microwaveable container. I love working with our color blocks because a little goes a long way, especially when used in clear melt and pour bases, They are highly pigmented so I used 1/4 of the color block. You can adjust the amount of color to your liking. Don’t be afraid to experiment!
Melt the soap base in increments of 30 seconds, stirring in between. It’s important to not microwave it for too long causing it to scorch – that’s why it is advised to stick to short bursts in the microwave. Alternatively, a double boiler can be used.
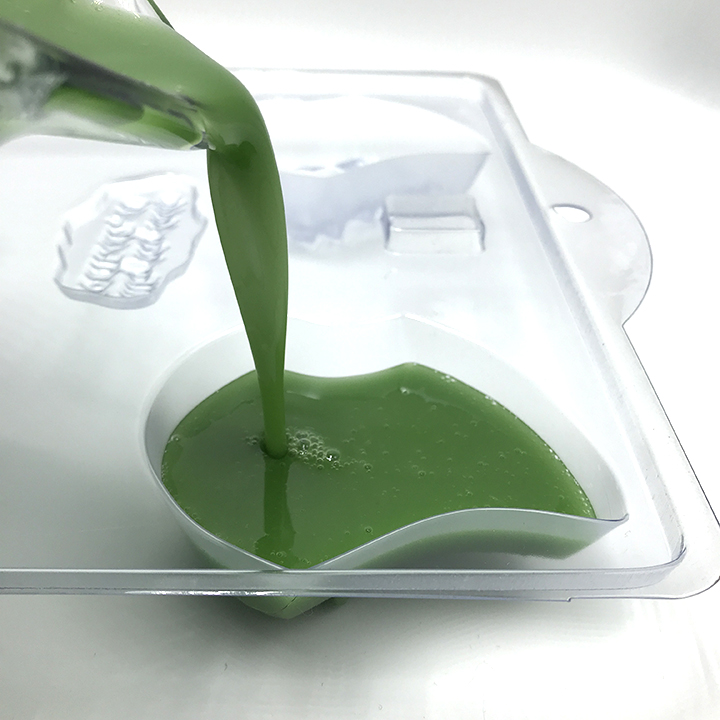
Once the soap is completely melted, it’s time to add the fragrance oil. I chose Northern Woods fragrance for this soap because it’s not your typical Christmas scent, but it has delicious notes of pine, amber and a sweet musk base.
Pour the soap into each cavity and give it a quick spritz with rubbing alcohol to get rid of those pesky bubbles. Allow the soap to cool for at least 6 hours before unmolding. Alternatively, you may place it in the refrigerator to speed up the process.
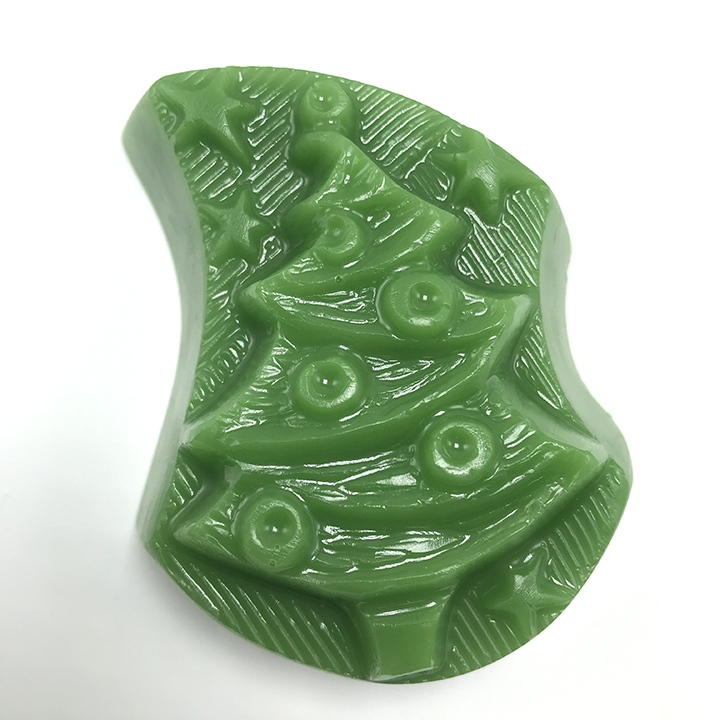
The trees come out beautiful whether you proceed to paint them or not. I like this mold because it’s more whimsical than some other tree molds.
Time to Paint
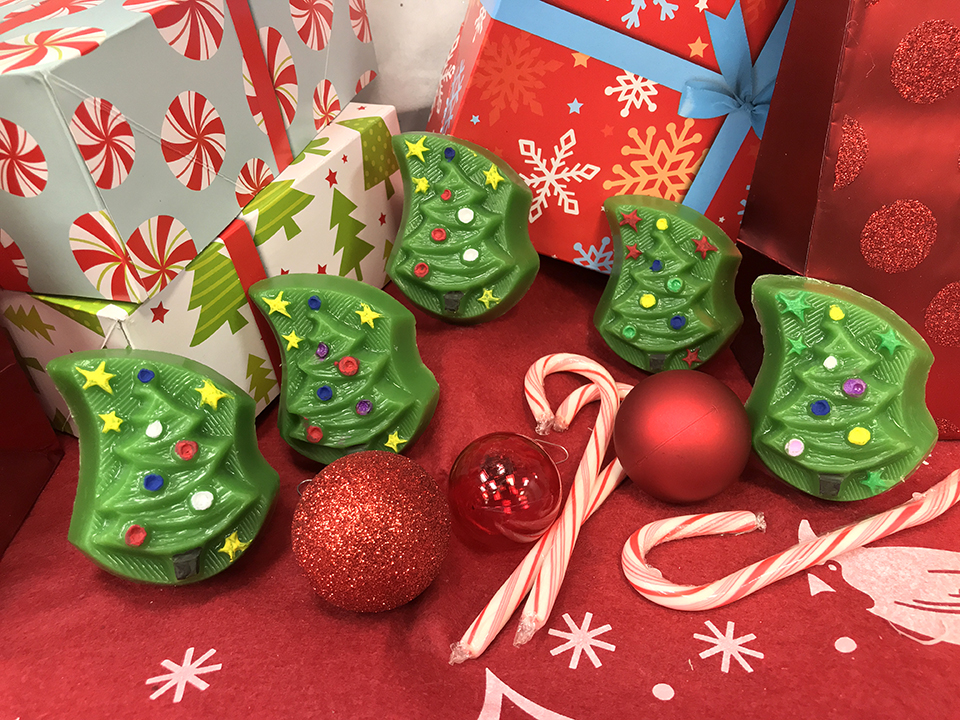
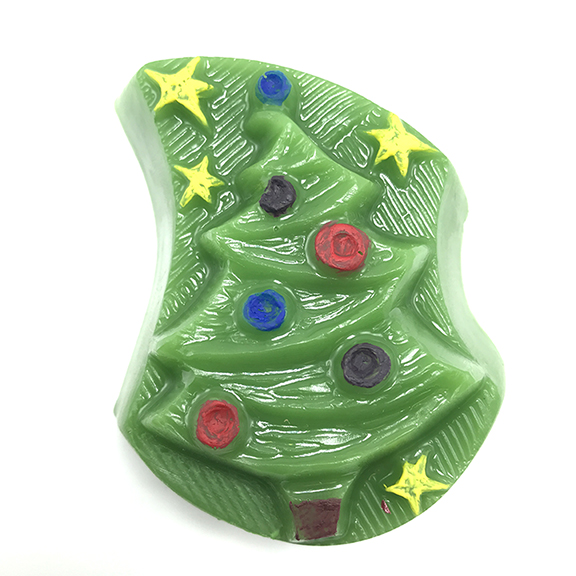
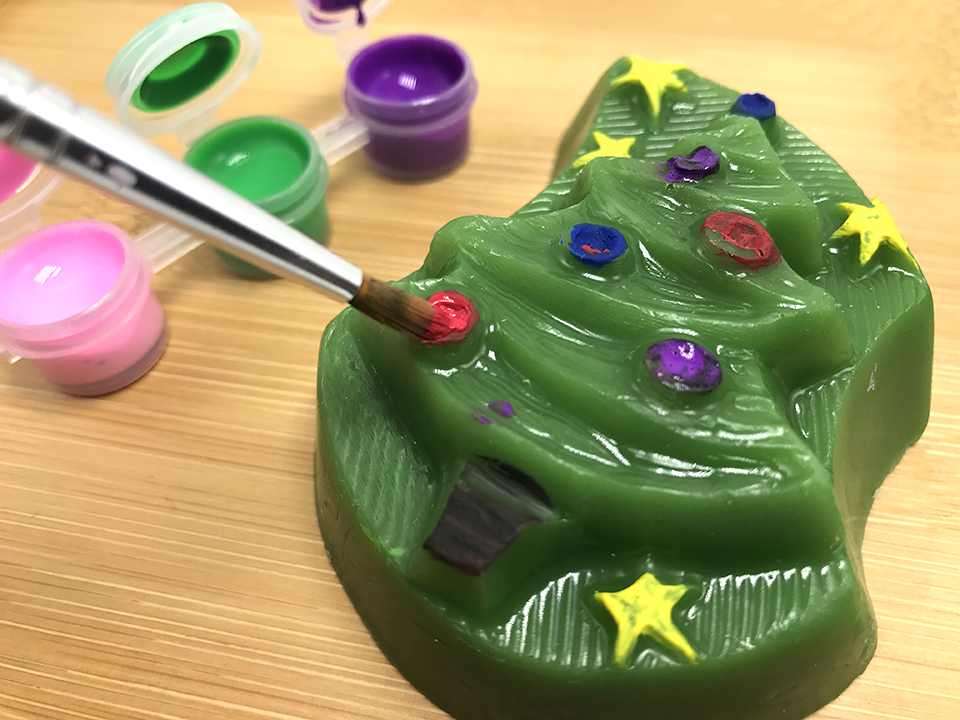
I’m a big fan of mixed media which inspired this soap. I like to create something and put a little twist on it. You can pick up acrylic paints at practically any retail store at an affordable price.
The kids and I had a lot of fun with this activity! Simply dip your paintbrush into the desired color and gently tap the tip of the brush on the ornament and star areas of the soap. I recommend doing three coats of paint for optimal color. Allow the paint to dry in between each new coat – patience is virtue. The soap that is already dry will help anchor the next layer.
Wrapping Up
Aren’t these just adorable? There’s nothing like a homemade, practical gift. Use your imagination to adopt the same type of painting element into other soap bars. Get creative with the colors! Don’t be afraid of failure. Remember, a lot of soapmaking can be trial and error – it is important to do your research before executing a new idea.
What are your favorite family-friendly projects? Drop us a note in the comment section below. We value your feedback and would love to hear your experiences!