I’m excited for this next recipe for several reasons:
- It’s easy (doesn’t that immediately make it a great recipe?!).
- It’s festive!
- It’s adorable- and will look oh so cute displayed in your powder room OR packaged up for a fun gift.
- It’s customizable in many different ways…
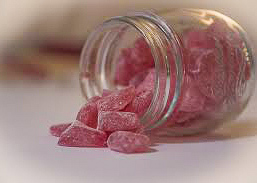
If you have any family members or friends that make hard tack candy (or maybe YOU make it!), you’re probably familiar with what it looks like. Shiny, transparent, colored pieces of candy in all different shapes and sizes that resemble colored glass. Know what I’m talking about? If not- google it (I google EVERYTHING). It’s typically a holiday season candy, but you can enjoy it all year round!
This next recipe can be treated the same- lovely for the holiday season, but just as pretty for any ordinary day! If you’ve made hard tack candy before, the process for this soap is similar. And the awesome part? You can make it in any color, with any fragrance, in pieces that are any size or shape that you’d like (see- I told you it was customizable in MANY different ways!). By using a basic melt and pour soap recipe and crafting it in a similar fashion to candy making, you can make this soap in a matter of minutes and display them beautifully just in time for the holidays!
Materials:
- Clear Stephenson Melt and Pour Soap Base (Crystal ST)
- Sample Kit of Matte Pigment Powder
- Fragrance Oil of your choice
- Cookie Sheet
- Knife
Directions:
- Following the basic steps for melt and pour soap, start by melting the base either by using a double boiler (or similar set up) or by simply pulsing in the microwave in short increments until completely liquefied with a microwave-safe bowl. It’s important for this recipe to use a clear base because hard tack candy is transparent. You’re trying to achieve the look of stained glass.
- Next, add color to your melted base using soap pigments. I’ve listed the sample kit because typically hard tack candy is set out during the holiday as a bowl full of multi-colored pieces. If you just want to use one single color for the entire batch, that’s completely fine. If you want multiple colors, just be sure to divide the melted base into separate bowls before coloring, or do separate small batches. To color, add the pigment and stir to blend starting with a little of the coloring and adding until you’ve reached your desired level of vibrancy.
- After you’ve colored your soap (or soaps if you’re doing multiple colors), add in the fragrance oil. This too should be done by first adding a small amount and increasing by drops until you’ve reached your desired concentration of fragrance. I like mine pretty potent, so I tend to be heavy-handed on the fragrance oil- but you can make a wonderful soap with just a light hint of scent and still have a great finished product.
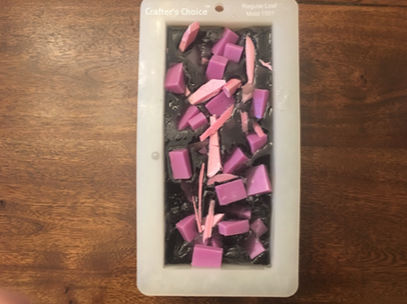
- Once your soap has been colored and scented, pour a thin layer onto a lined cookie sheet (just as you would line a wooden soap mold by using a piece of parchment paper), and allow to cool and harden.
- Here comes the fun part! Hardtack candy is typically presented in mismatched pieces that resemble broken glass- so there’s really no rhyme or reason to your chopping! You CAN’T mess this up! After unmolding and peeling away the lining paper, carefully chop the soap into small pieces using a knife- make sizes that will be good for single-time use.

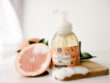
Display the pieces in a glass bowl (so that the colorful soap pieces are easily seen), just as you would candy, besides your sink. They look gorgeous and add such a special touch for the holiday season. Toss a bunch in a pretty glass jar for a lovely gift that your friends and family will love!
Another fun option for fun packaging? Wrap up separate pieces in clear or colored cellophane and twists the edges- just like hard candies are wrapped. How cute, right?!
Have fun with this recipe! I hope you enjoy it!