Troubleshooting in Melt and Pour Soap
If you have experienced difficulties with melt-and-pour soapmaking, you are not alone. When working with so many variables and different kinds of soap-making supplies, there are dozens of ways it can go wrong. Mistakes range from sinking lavender buds, soap spills, unfortunate inclusions of cat hair, and mottled orange and blue supposed-to-be layers. Here are some common hiccups you may experience along the way, as well as remedies and points for further reference:

The colors I used to layer the soap mixed together in the mold.
Possible causes:
- Temperature of soap was too hot
- Forceful pour
- Second layer was poured too soon
Timing and temperature are two of the key factors in melt-and-pour soapmaking. Mastering both of these areas will give you less margin for error, but sometimes, things just happen. I’ve attempted to make layered soap without having a thermometer available, so I’ve learned to at least use colors that pair well together in case of an accidental mistake.
Learn more in Melt and Pour 101: Techniques, Melt and Pour 101: Choosing a Soap Base, and Melt and Pour 101: Colorants.
The soap layers are coming apart.
Possible causes:
- Rubbing alcohol was not used to help adhere layers
- Soap was too cool when poured
- First layer of soap was too cool when being poured upon
Temperature and timing can, as you see in the photo to the right, literally make or break your soap. You must pour around 120° F and pour gently. Layers can be tricky at first, but once you master them, they are simple additions to soap making.
Learn more in Melt and Pour 101: Techniques.

The soap has discolored.
Possible causes:
- The fragrance oil used has a high content of vanillin
- The fragrance or essential oil used has a dark appearance out of bottle
When a soap begins to turn brown, vanillin is usually the culprit. Vanillin (or vanilla) is otherwise known for its notes of sweetness and warmth. It is a naturally occurring compound that is often found in bakery-type fragrance oils. Plan ahead by checking the vanillin content of your fragrance oil and sticking to colors that will still work with a tinge of beige or brown.
Learn more in Melt and Pour 101: Fragrance & Essential Oils.
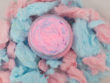
I used botanicals/flower petals in my soap and now it looks undesirable.
Possible causes:
- Botanicals added at a high temperature
- This is to be expected
Since botanicals such as calendula petals and lavender buds are organic matter, they are prone to (and most likely will) discolor your soap. Most flower petals and other botanicals will turn your soap brown or green. Due to the organic makeup of the flower buds, decomposition will occur. Only add botanicals to the soap for decoration after it has already begun to cool and you are able to visualize a skin beginning to form on the soap. Gently add your botanicals and spritz the soap with alcohol.
Learn more in Melt & Pour 101: Additives & Botanicals.


There are bubbles on or in my soap.
Possible causes:
- Soap was not spritzed with rubbing alcohol
- Soap base was overheated
- Soap base was not stirred gently enough while melting
- Soap was poured into mold from a high distance
- Ingredients were not mixed gently enough
Bubbles may appear on the surface as you pour the soap into the mold. When the soap is being poured too quickly or harshly, it may experience aeration and bubbles will rise to the top. This is where the spray bottle of rubbing alcohol is useful — quickly give the surface of the soap a quick spritz after pouring and watch the bubbles disappear before your eyes.
Learn more in Melt and Pour 101: Techniques.
The soap burns my skin or causes a reaction.
Possible causes:
- Fragrance or essential oil used is not skin-safe
- Using more than the maximum recommended amount of fragrance per IFRA’s guidelines
- Possible allergic reaction
If the soap burns your skin or causes any type of reaction, stop using it immediately. Do a patch test for allergic reactions prior to using any products. Keep inventory of the fragrance oils, bases, and colorants used to avoid using them again in the future.
Learn more in Melt and Pour 101: Fragrance & Essential Oils.


The additives in the soap have sunken.
Possible causes:
- Additives were incorporated at too high of a temperature
- Suspending soap base was not used
- Additive particle size and weight do not allow for easy suspension and dispersion
If you are having trouble with your additives sinking, try using a suspending soap base. These are specially formulated to suspend small particles in melt and pour soap. Other soap bases are also capable of having additives included but you have to pay attention to temperature and timing. Use a digital infrared thermometer for quick and easy temperature readings.
Learn more in Melt & Pour 101: Additives & Botanicals and Melt and Pour 101: Choosing a Soap Base.
The soap doesn’t lather or bubble up as much as desired.
Possible causes:
- Too much fragrance was added
- Too much extra oils were used
There are a few possibilities as to why this is happening. When making melt and pour soap, it is necessary to keep additives to a minimum. These are pre-formulated bases that are meant to be melted and poured. Using too much oil or butter (such as shea butter) in your soap base can compromise the bubbling action. Many soap bases are already enriched with those moisturizers, so if you do want to add more butter, start with a little bit such as 1 teaspoon to 1 tablespoon per 1 pound of soap base.
Learn more in Melt & Pour 101: Additives & Botanicals and Melt and Pour 101: Choosing a Soap Base.


Small bumps or droplets have formed on the finished soap.
Possible causes:
- Soap is stored in a humid environment
- Drastic temperature changes
- Soap is not wrapped
Glycerin is a common component in melt-and-pour soaps. Glycerin is a humectant, which means it attracts moisture. This is why our skin often feels moisturized and refreshed after we use soap. Glycerin will sometimes attract moisture and humidity from the air, creating what looks like sweat, dew, or droplets on the soap bar. This is only cosmetic and can easily be fixed. Try to store your handmade soap in a cool, climate-controlled environment. If moisture develops on the bars of soap, you may gently pat them with a cloth or paper towel. The soap is still usable and the dew will wash off when the bar is used.
Learn more in Melt and Pour 101: Choosing a Soap Base.
There are ripples or wrinkles on the surface of the soap.
Possible causes:
- Soap mold was bumped while still cooling
- Soap mold was moved prematurely from work area.
Be mindful of your mold as a 3×4-inch mold would not need to cool as long as a 12×12-inch loaf mold. For smaller molds, six hours is recommended. Loaf molds need to set longer, for about 12–24 hours. Once the soap has set for about an hour, you may carefully transfer the soap to the refrigerator to help speed up the process. Try to unmold the next day or at least 12 hours later. Be mindful of your work area and if you are making multiple batches, try putting your molds on a cutting board for easy pouring and transfer.
Learn more in Melt and Pour 101: Techniques.


I am not satisfied with my end product.
Possible causes:
- Soap doesn’t lather
- Soap isn’t aesthetically pleasing
- Soap is too lightly scented
- Design didn’t turn out as planned
Never throw anything away as you will be amazed how all those little odds and ends will come in handy later. A great way to reuse this soap is to do a confetti or mosaic effect where you put all the bits and pieces of scrap soap in a mold and pour white soap around it to make a solid bar. I’ve even heard of people who make soap in this manner for homeless shelters and those who are underprivileged. This is a unique way to create beautiful soap bars.
Learn more in Melt and Pour 101: Techniques.
The soap smelled great but then the aroma dissipated.
Possible causes:
- Not enough fragrance or essential oil was used
- Fragrance or essential oil was mixed into soap at a high temperature
- Essential oil was used, particularly a citrus type
- Soap hasn’t been stored properly
When a fragrance fades, it means that the soap has been overheated. Citrus essential oils are also notorious for having a fading aroma in soap. Try anchoring the scent with a teaspoon of Kaolin clay.
Learn more in Melt and Pour 101: Fragrance & Essential Oils.

Tips for Successful Soapmaking
As we conclude our Melt and Pour 101 Series, here are some unexpected tips I have to offer. Taking the time to learn your craft will make your new hobby and learning experience painless. Some of these may seem like common sense, but these are some things that have slipped my mind and others as soap makers.
Research and learning are #1 – learn the basics of melt and pour soapmaking in this series.
Keep kids and animals away from your soaping area.
Pull your hair back.
Check out your local dollar store for supplies such as skewers for swirling, spoons for stirring, etc.
Prepare your workspace before you begin your project.
Give yourself enough time to thoroughly complete the project.
Know where you will let the soap cool – it’s all fun until you realize you poured a batch of soap you cannot yet move!
Place your soap mold on a cutting board or baking sheet if you will need to move it from the pouring area.
Explore outside the box
Find dedicated soapmaking forums and groups on social media to join in on the conversation.
Always seek answers. If you can’t find it, look further. Network.
Never throw away soap scraps. Store them in a zipper bag or plastic storage container.
Always have rubbing alcohol on hand.
Believe in yourself and trust yourself.
Let us see your melt and pour soap creations! Head over to our Facebook page to share!
Bulk Apothecary provides a wide range of quality soap making supplies for large-scale and small-scale needs. Whether you are looking for soap bases, colorants, dried botanicals, or other additives, Bulk Apothecary caters to a variety of needs. Along with quality soap making supplies, Bulk Apothecary also carries wholesale essential oils and other beneficial apothecary products like herbs and spices, clays, and decorative botanicals. Check out the Bulk Apothecary website to learn more about their wholesale products or contact their team with any questions.