Beginner Techniques in Melt and Pour Soap
Now that you’ve mastered the basics of melt and pour soapmaking, it’s time to move on to some beginner-friendly techniques. If you missed the previous posts in our Melt and Pour 101 Series, be sure to check them out by clicking here. Our goal is to help you create a successful product, so don’t miss out on the articles in which we discussed things like how to choose a soap base and how to customize them to your liking.

Layers
Layers are one of the most important basic techniques of soapmaking. Through trial and error, it also allows you to really learn your soap .
How does it behave at certain temperatures – is it too fluid? How quickly has a skin formed on top of the melted soap? Does it melt faster than other soap bases you’ve tried? How does it behave when melted in a double boiler versus a microwave? I encourage you to keep a notebook and account these instances. Of course there are many variables batch to batch, but this will help you get a baseline on what to expect.
For successful layers, make sure there is a medium-thin skin on top of the first layer of soap. Spritz with alcohol to help the layers adhere. If the soap is too cool, the layers will split apart upon unmolding. You must also be sure the temperature of the second layer soap isn’t so hot that it melts through the first layer. This makes a really neat swirl/marble effect, but we’ll get to that in the next section. I like to maintain the Bob Ross philosophy – we don’t make mistakes, just happy accidents!

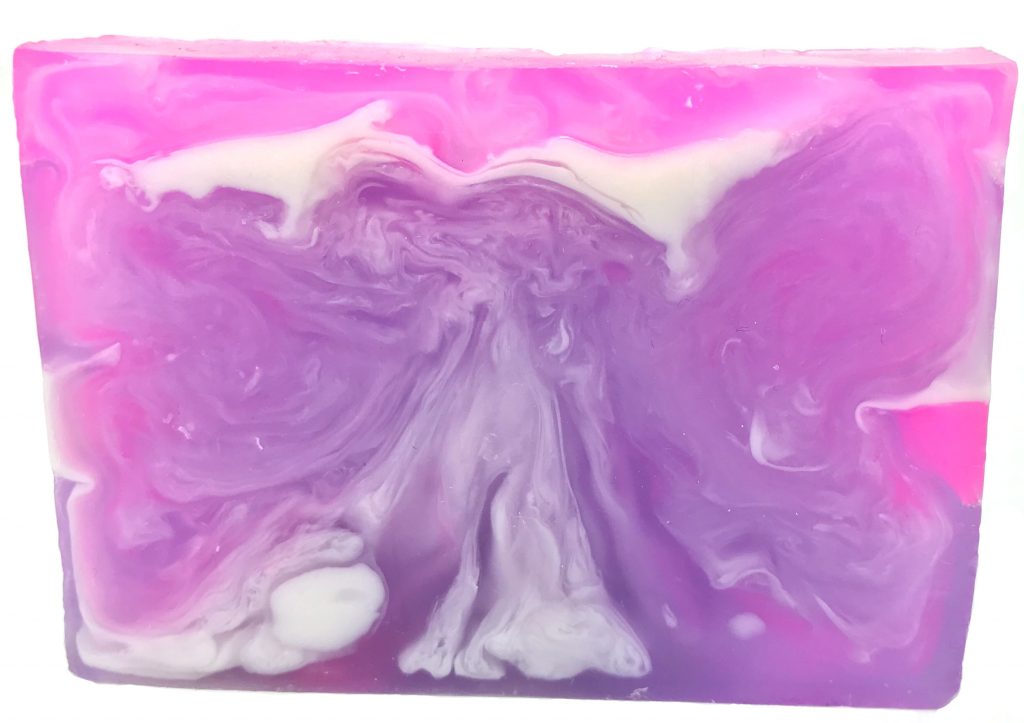
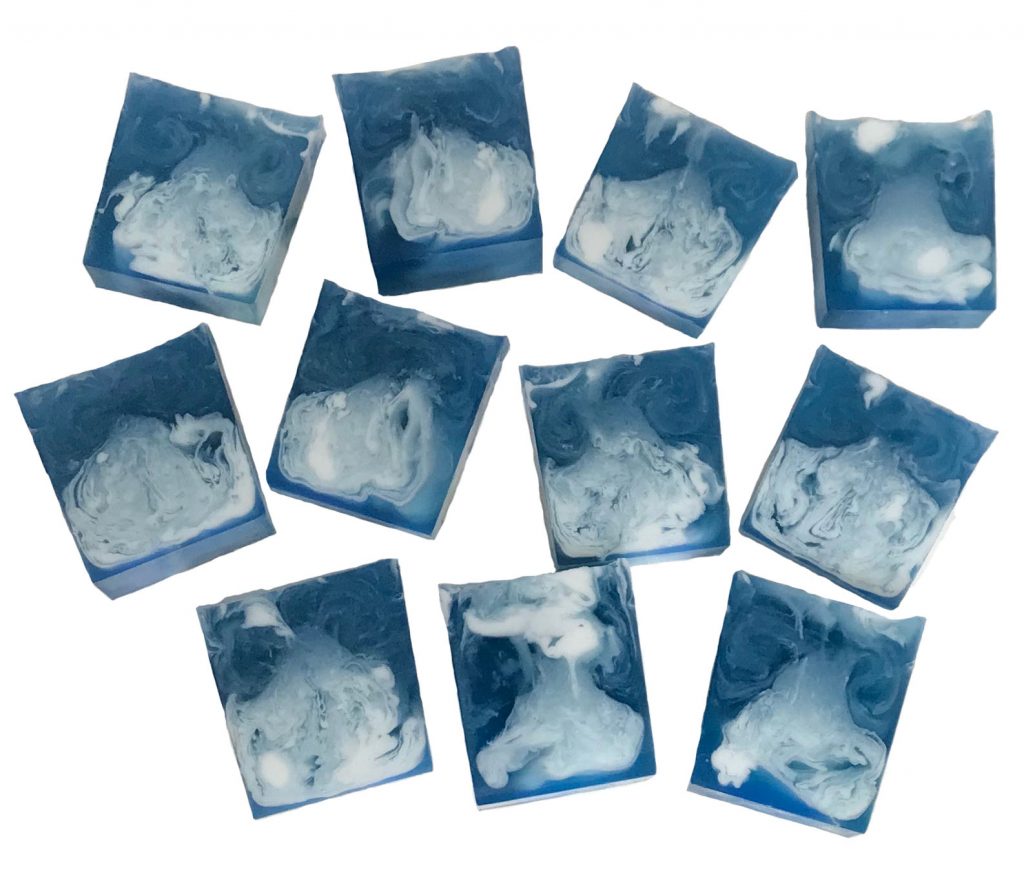
Swirls
Swirls can be a bit tricky in melt and pour soap because temperature and timing are everything. Temperature control is especially important when you intend to swirl contrasting colors. To swirl melt and pour soap base, using a wooden skewer is the easiest tool I’ve come across. For extra vibrance or to add a pop of color, I like to use any kind of melted soap base that is white. This also allows the contrast of the colors to really come through.
To swirl soap, ensure your are working at a low temperature and both of the colored soaps are at or below 130° F. Wait until a thin skin has formed on the surface on the first layer of soap. To create swirls, you can either use a skewer to puncture the first layer of soap, or you can pour the second swirled layer from higher above the mold. This gives the soap more surface impact and penetrative action. When swirling, move in a circular direction or use the skewer to “pull” the soap from one side of the mold to the other. The skewer can get messy as soap actively cools while you work, so have several on hand. As always, spritz with rubbing alcohol between swirls. This will help keep the surface of the soap smooth and free of bubbles after you are finished working with it.
Swirls can be accomplished in both loaf molds and cavity molds. I recommend your first attempt at swirling be something simple such as a transparent color and opaque white. That way, if things don’t go as planned, you will still have a pretty colored-bar instead of some mashup of orange and blue that could mix and become an unsightly brown color.

Embeds
Since we touched on embedding botanicals last week in Melt and Pour 101, let’s look at some more ideas and techniques for embedding.
Embeds are an easy way to make your soap more aesthetically appealing. Just as if you were adding ground oats as a skin exfoliant to suspend within the bar of soap, temperature is just as important when embedding other items.
Embedding items into soap is so much fun! Remember – high temperatures cause the soap base to become very fluid, which increases the chances of your embeds sinking. Due to its temperature, the soap is not viscous enough to hold the weight and/or particle size.
Have fun and experiment with embeds! This is also a great way to utilize leftover soap scraps and end pieces from previous batches. Try embedding soap in soap, loofah sponges, children’s toys, a dollar bill… this is where your imagination comes in handy!


Painting Soap
Acrylic paint is safe to use to paint your melt and pour soap. The paint will eventually wash off, so it’s best to save this type of soap for decorative purposes only. Any type of non-toxic acrylic paint and paint brush will do. Get creative with it! Acrylic paint was used on the soap to the right and mica powder on the soap to the left. Mica painting is fun – just dip your paint brush in some rubbing alcohol, dab it in mica color and watch the vibrance come to life! A little goes a long way – also keep in mind that using too much rubbing alcohol will cause the ‘paint” to run.

Thinking Outside the Soap Mold
There are so many under-utilized items in our daily lives that could help in our soapmaking adventures. Ever get the itch to make another batch of soap, but your mold is already full and cooling? Well, perhaps you could try using a clean milk carton lined with parchment paper as a quick mold.
How about plastic containers? Popsicle molds? Candy molds? Bath bomb molds? Be sure that the materials are non toxic and heat-safe. I once poured a batch of melt and pour soap into a plastic drawer organizer and it worked out perfectly! Keep your eyes peeled when you are at the store – many kitchen and baking items are appropriate for soapmaking – just be sure to keep your soap supplies separate to avoid cross contamination.


This has been very helpful for a beginner. Thank you
You’re welcome!