Spring is here! These colorful soaps are perfect for your transition into the next season. Bright, cheery and full of fresh, fruity fragrances that are sure to put you in the mood for spring (as if you weren’t ready for it anyway…). By getting creative with a simple soap mold, you can achieve this fun spin on layered soap in just a few steps!
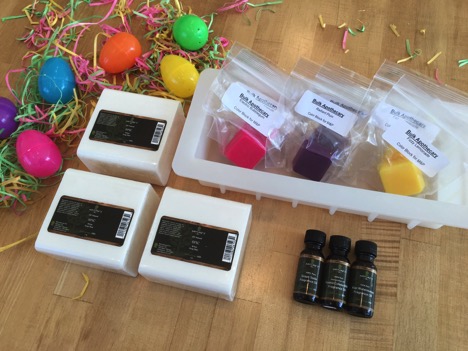
You’ll need:
- 3 lbs. White Melt & Pour Soap Base
- 3 Fragrance Oils
- 3 Soap Color Blocks (2 block of each color)
- Silicone Loaf Mold
- Clear Cello Bags
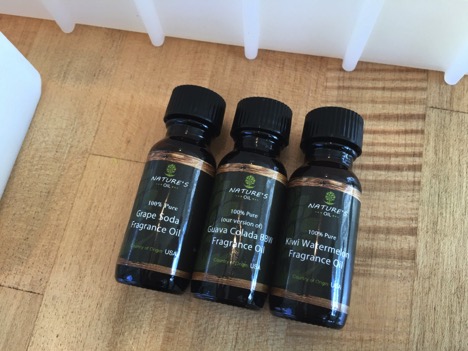
Since this is a spring time soap and I’m using bright, cheerful colors, I chose fragrance oils that are fresh and fruity (and smell SOOOO good!). You can use any color/fragrance combination you’d like to make your soap perfect for you!
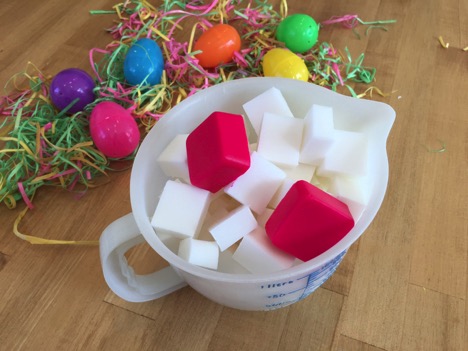
To make each layer, you’ll be making 3 separate soap mixtures. For the first layer you’ll need 1 ¼ lbs. of white soap base, cubed, and 2 color blocks. I’m using Electric Bubble Gum, Fizzy Lemonade and Radiant Plum to color my layers.
Melt the soap cubes and color blocks in the microwave using short bursts until a smooth, even mixture is achieved. Stir well to blend the color throughout.
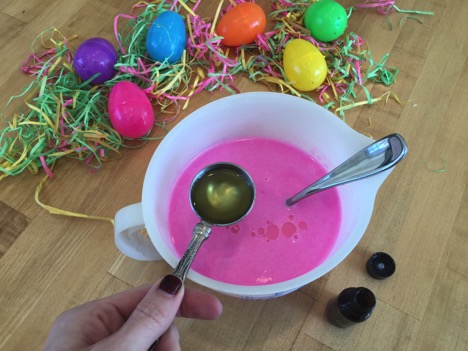
Stir in up to 1 TBS of fragrance oil. For my pink layer I used Kiwi Watermelon.
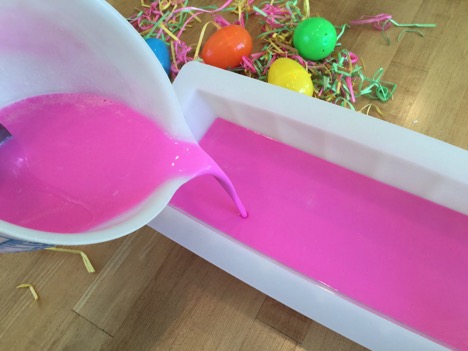
To create the slanted layers within the soap, you’ll need to pour the mixture unevenly. To do this, prop one side of the mold up (simply tuck something underneath one side) and carefully pour the soap into the bottom of the mold.
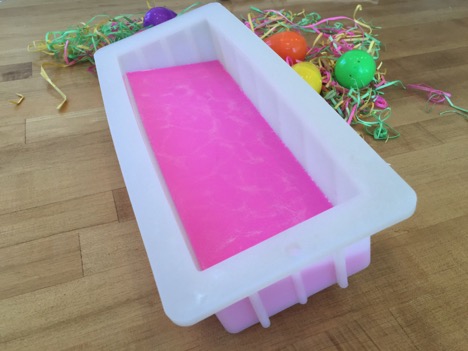
Allow the first layer to cool and harden on the slanted surface.
To prepare the next layer, repeat the melting/coloring/and scenting steps above. For the second layer, use ½ lb. of the soap base, cubed, and 2 color blocks. I paired the radiant plum color blocks with the grape soda fragrance oil.
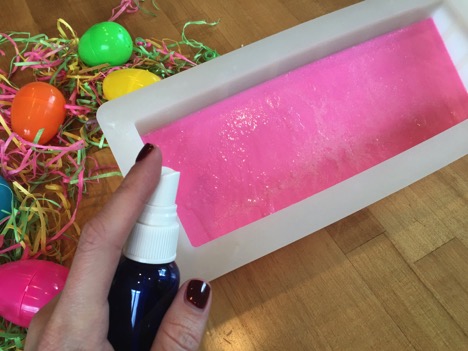
Prep the surface of the first layer by spraying rubbing alcohol. This will make the surface slightly tacky and allow the second layer to adhere.
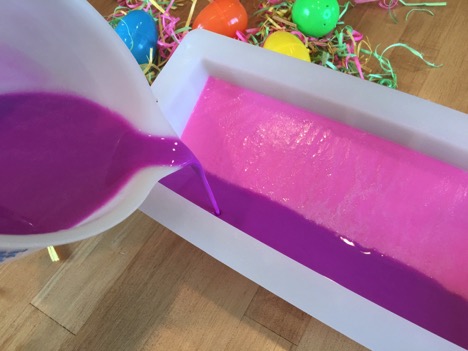
Turn the mold and prop up the opposite side, pouring the purple soap into the deepest part of the mold.
Allow to cool and harden.
Repeat the melting/coloring/scenting steps for the last layer. I paired the fizzy lemonade color blocks with guava colada fragrance oil.
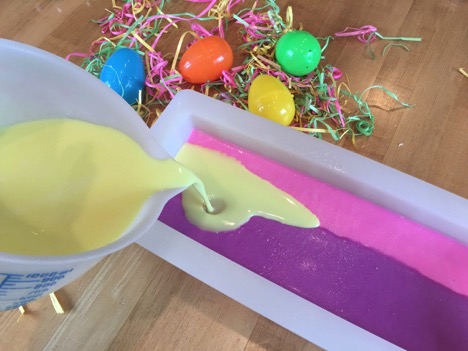
With the mold flat on the counter, spray the second layer with rubbing alcohol and pour the last layer into the mold. Spritz the surface of the soap once more with rubbing alcohol to eliminate any air bubbles that may have formed.
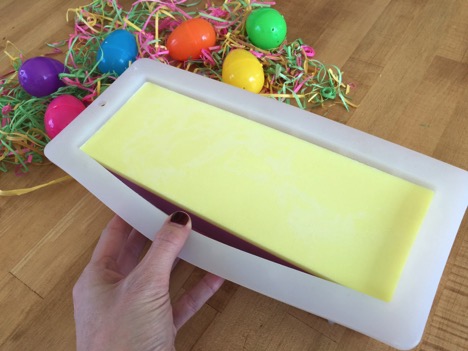
Allow the soap to cool and harden completely.
When ready, peel the sides of the mold away from the soap, turn the mold over and gently push the block out.
Cut into even slices with a straight soap cutter.
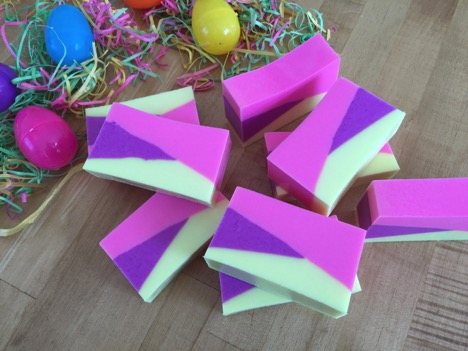
How pretty are these?!
With just a few simple steps you can create beautiful soaps using melt and pour bases.
Get creative. Use different color and fragrance combinations. Pour the mixture in different ways or add more layers! It’s so easy to make fun, fresh soaps right in your own home.
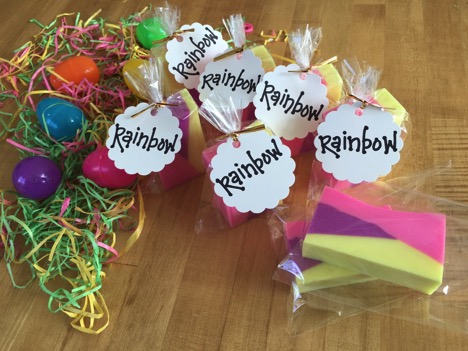
PS- If you’re gifting or selling your soaps, don’t forget the packaging! Clear cello bags display your work while simple tags tell recipients exactly what they’re receiving!
The recipe looks easy and the result is amazing! I definitely want to try to make those soaps. Please keep it up with your wonderful creative ideas!
Zaria
Hi, can I use your mica colors instead of blocks? Btw, I have bought lots of items from you and love them, I am building a great soap business. Thank you.
Glad you like our products! Yes you can use the matte colors instead, but please use a very small pinch (around 0.01 oz per 3-5 pounds of soap) as it can possibly stain.
Packaging them in cello bags like the picture, willit not make soap sweat?
It is possible; you can possibly reduce that effect by trying one of our low sweat melt and pour soap bases.